After pumping out the water from the flood and giving a chance for the site to dry out a bit, we were ready to continue. After ensuring that the telescope pier forms were plumb and bracing them as well as we could, the first step would be pressure washing all the mud from the surface of the footings, so that the frost walls that would sit on top would have a better chance of adhering to the footings.
When I was originally planning the observatory, I had thought I would use plywood forms for the frost walls – it’s what my dad had used all his life when building houses, and what I was familiar with. However, plywood forms just aren’t popular any more when building houses. Most people now use insulated concrete forms (ICF) which are foam blocks that are stacked together (somewhat like Lego bricks) and then have concrete poured inside them. They are more expensive than renting plywood forms, but are popular because they also provide good insulation for a cement basement. But since the observatory is going to be unheated, spending the extra money on insulated forms didn’t seem to make much financial sense.
That is, until, I started calling around to see about renting plywood concrete forms. It turns out that since people don’t usually build houses that way any more, I wasn’t able to find any company in the area that rents them. So in the end, I ended up having to use ICF blocks after all. Though more expensive, they would be a bit easier to deal with than plywood forms, plus they stay in place after the cement is poured, so that would eliminate the extra step of having to strip all the forms off afterwards.
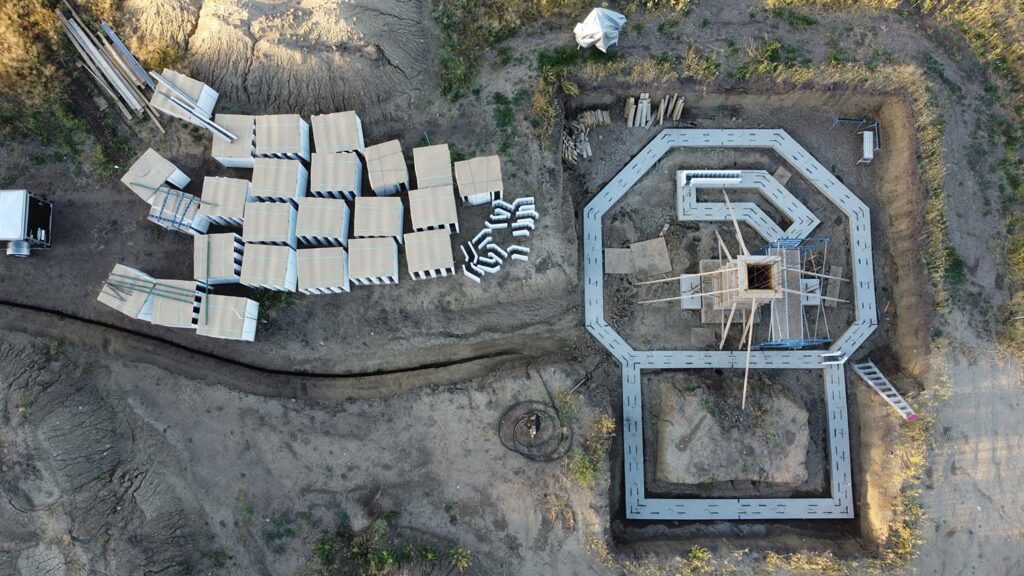
A friend of mine, Eldon Gjesdal of Energy Efficient Homes, had a lot of experience in working with ICF, so he helped me source the blocks, gave advice on how to install them, and rented the scaffolding necessary to support them. The blocks we used were manufactured by Plastifab, and you can see them in pallets after having been unloaded by the semitrailer that delivered them.
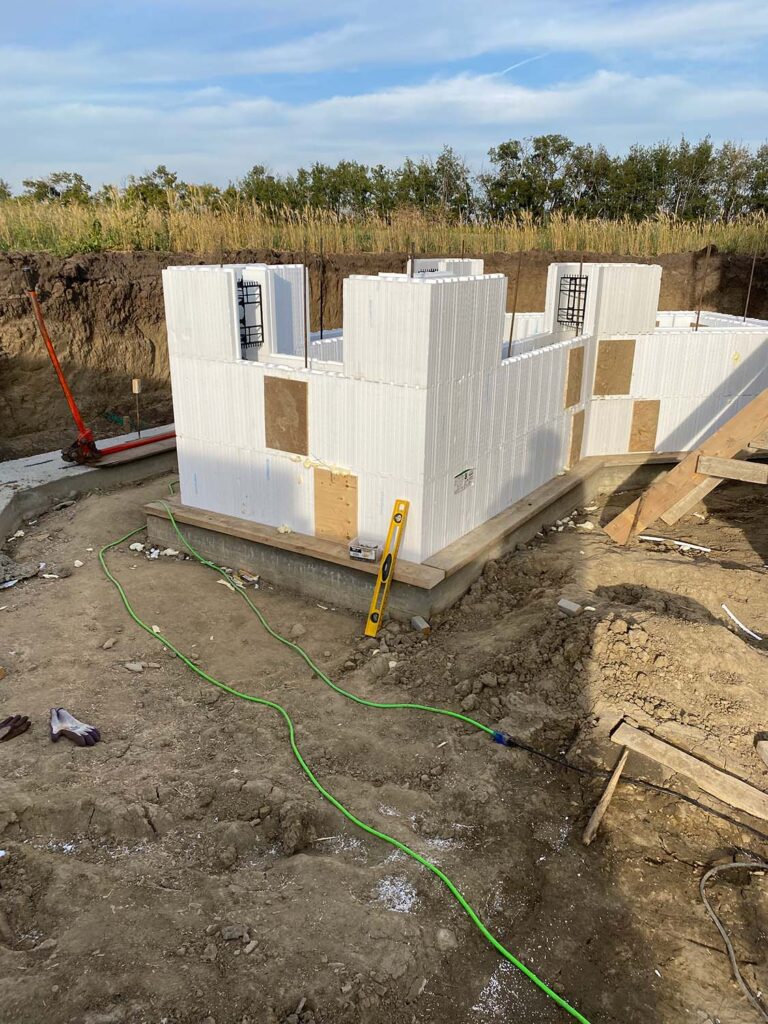
You’ll also see black dashed lines that I had spray painted on the footings, that designate where the walls would sit on the footings. The lines were re-surveyed from the original north-south and east-west reference pegs that were established from the beginning, to ensure that the orientation of the building would still be as accurate as possible. Also, we have set up our blue scaffolding inside the structure which will be needed to pour the cement for the telescope pier but will be difficult to get in place after the ICF blocks are installed around the perimeter.
Here, we have done the first row of ICF, starting at the foundation that will support the stairwell going to the second story (which will be load bearing). The pieces do fit together somewhat like Lego bricks, but it is not quite that simple. Since the length of the walls will never exactly correspond to the length of the bricks, every straight section of wall needs to have an ICF block cut to fit. But where it is cut, the “tongue and groove” interlocking that gives the blocks their rigidity is defeated. So to reinforce those joints, we used spray foam between the blocks, and screwed plywood “splice plates” over the joint.
Though stacking the ICF blocks in place goes relatively quickly, making these splices takes most of the time. So though installing ICF is certainly a time saver when working on a long, straight wall, it is actually quite time consuming when doing multiple shorter sections of walls like this.
As the blocks are laid out, horizontal and vertical rebar was laid in the blocks and tied in with tie wire. We also used zip ties internally to help prevent the blocks from separating longitudinally under the pressure of the cement when it is poured.
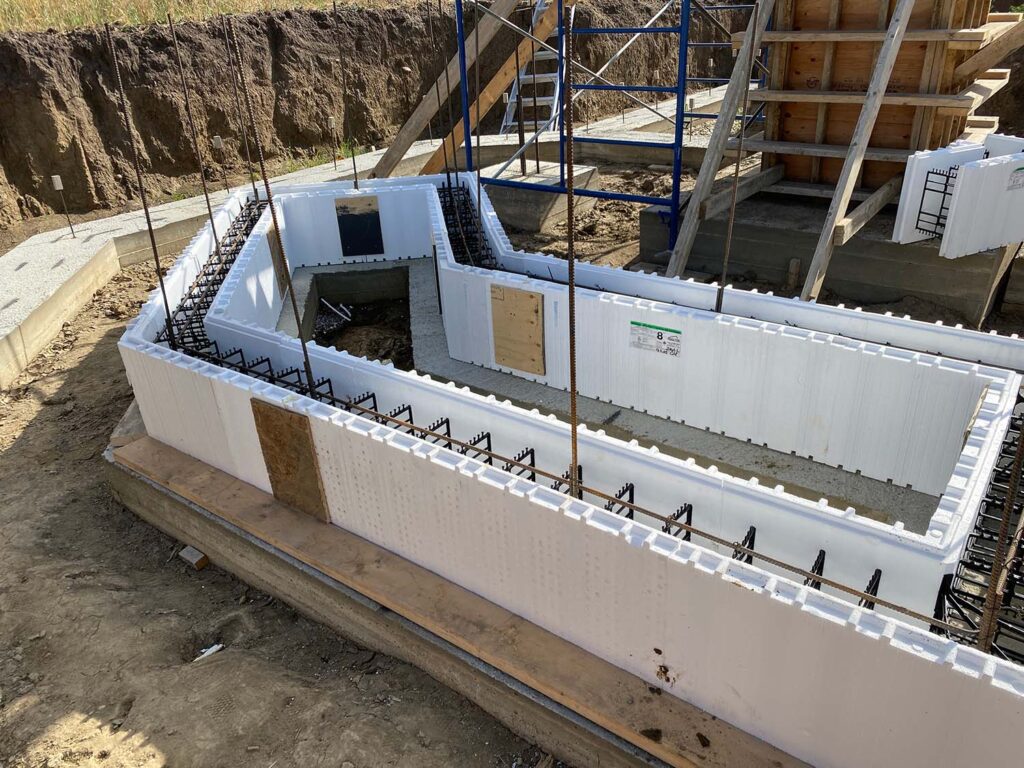
Here, we have finished the second row and are working on the third row.
As the structure got taller, it was time to add the scaffolding/bracing. This serves two purposes. First, it acts as a vertical brace to the wall so it can be made plumb, and adjusted during the pour of cement to remain so. This is done by the green supports, which twist and act as rigid turnbuckles.
Secondly, it provides a platform that can be used to work higher above the ground, both while continuing to build the walls upward, as well as later when the cement is being poured.
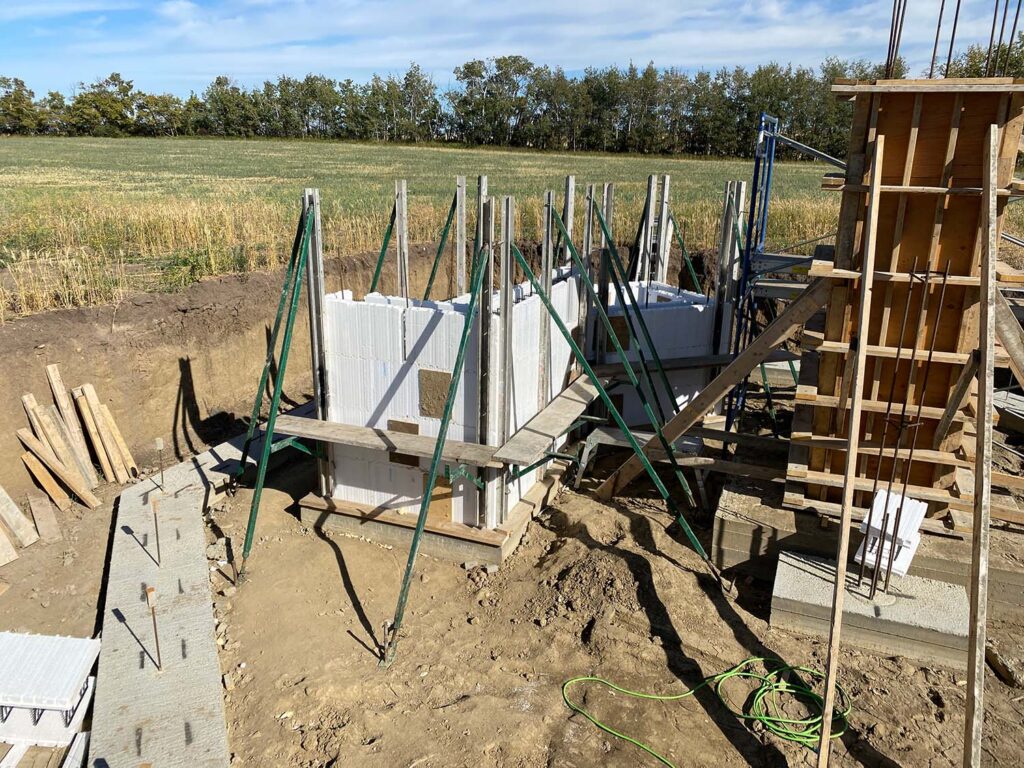
At this point, we have finished the inner ICF frost wall that will be below the staircase, and are partway through constructing the octagonal structure. Jeannie is working on tying the rebar in place as we go.

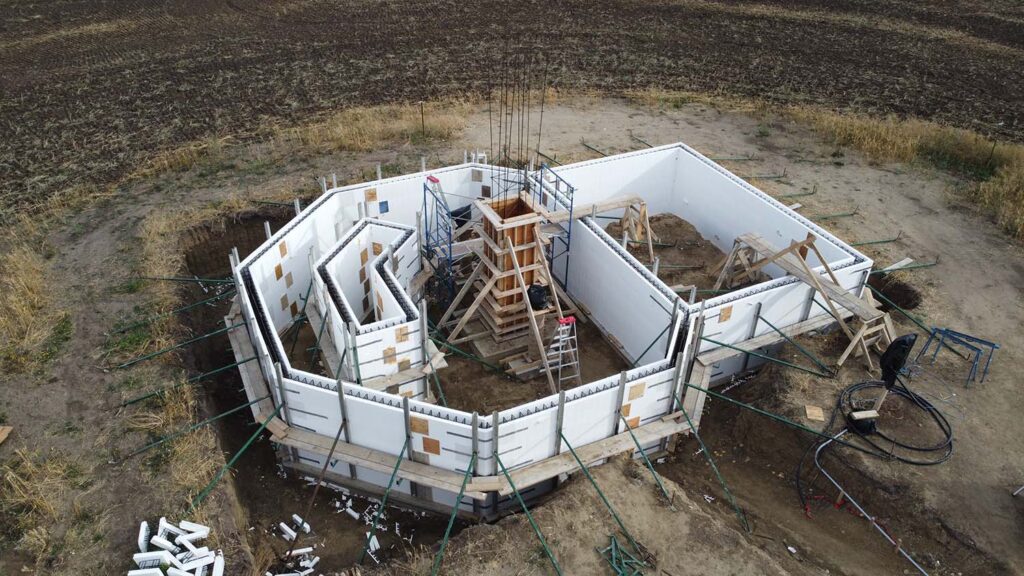
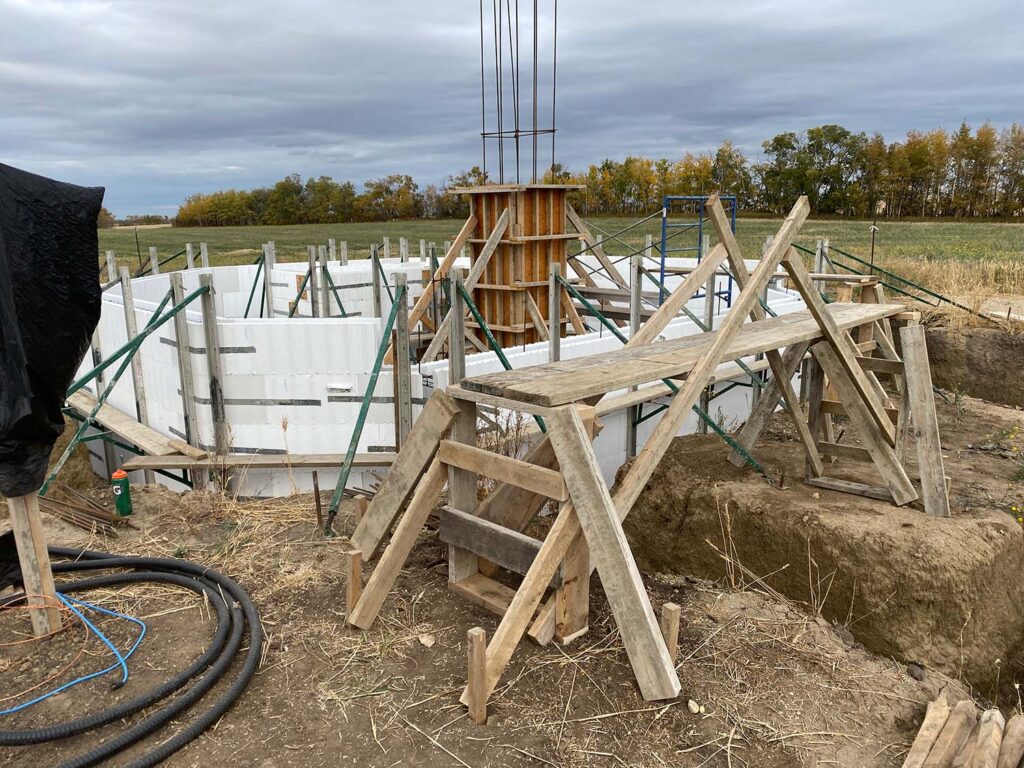
As the ICF walls grew taller, we needed a way to easily be able to get in and out of the enclosed space. So I had to build “bridges” that would span over the top of the walls. The one in the foreground will allow us to get into the rectangular area of the foundation from outside, and the one in the background using our blue scaffolding as one end of the bridge allowed us to transition from the rectangular area into the octagonal one.
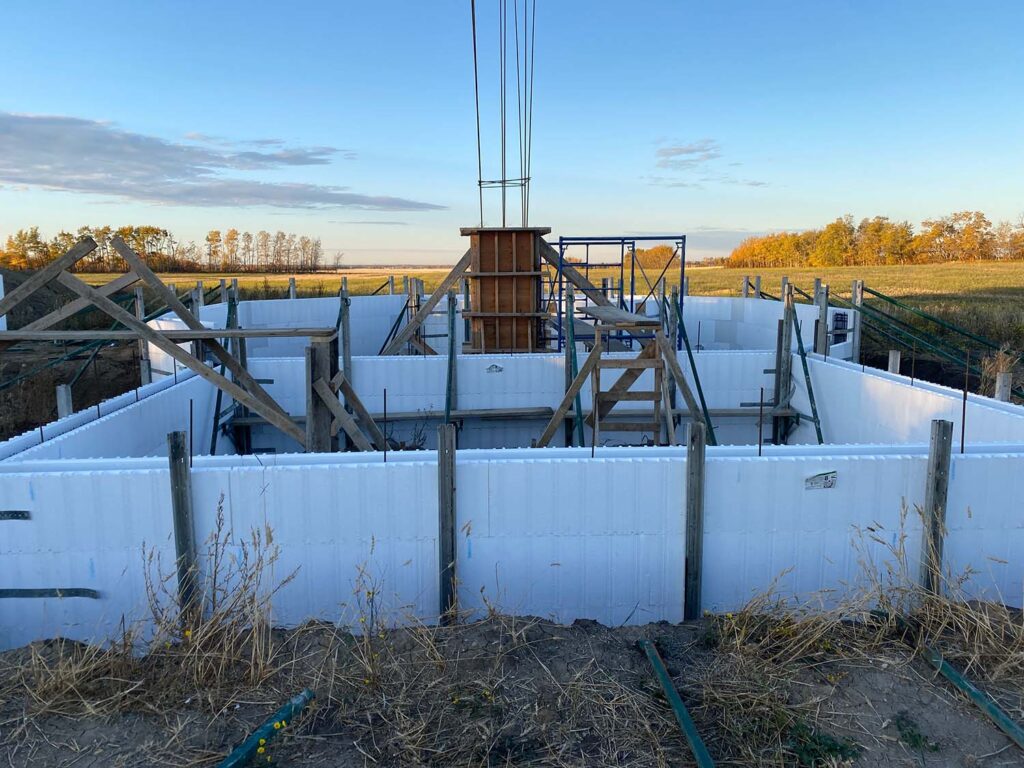
Here, we are nearing completion of the ICF frost wall construction. The octagonal section is mostly complete, and the rectangular section just has the top row to go. Where the rectangular section joins to the octagonal one, I had to modify 45 and 90 degree corners to make a three way connection, so that required additional support and bracing.
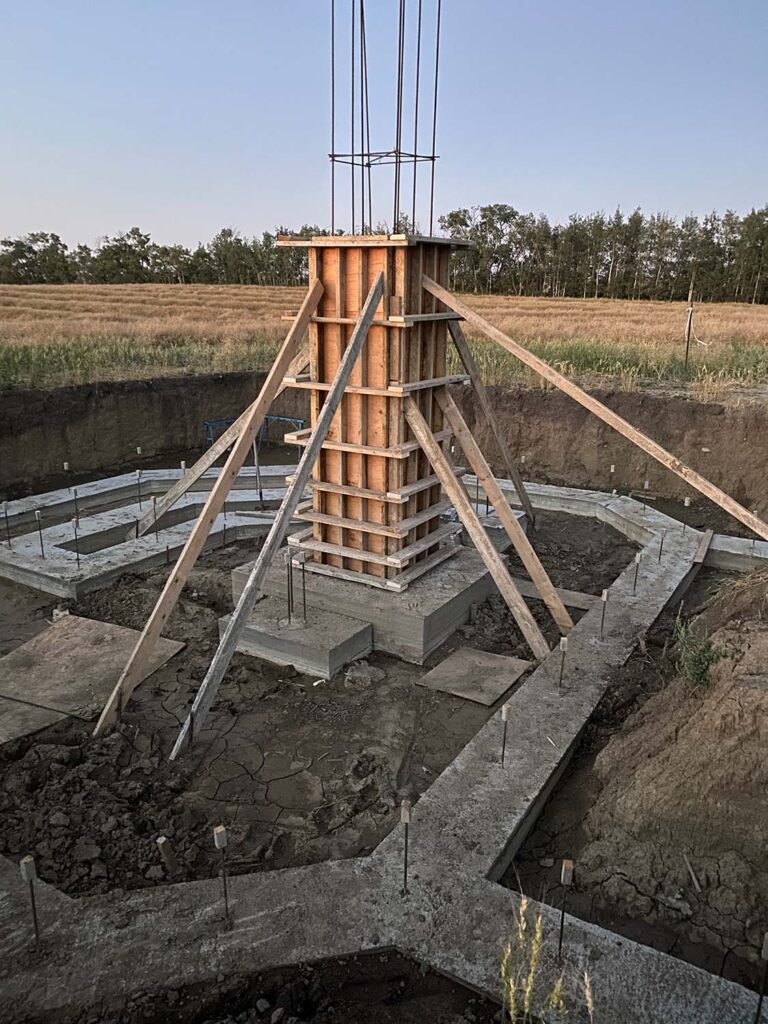
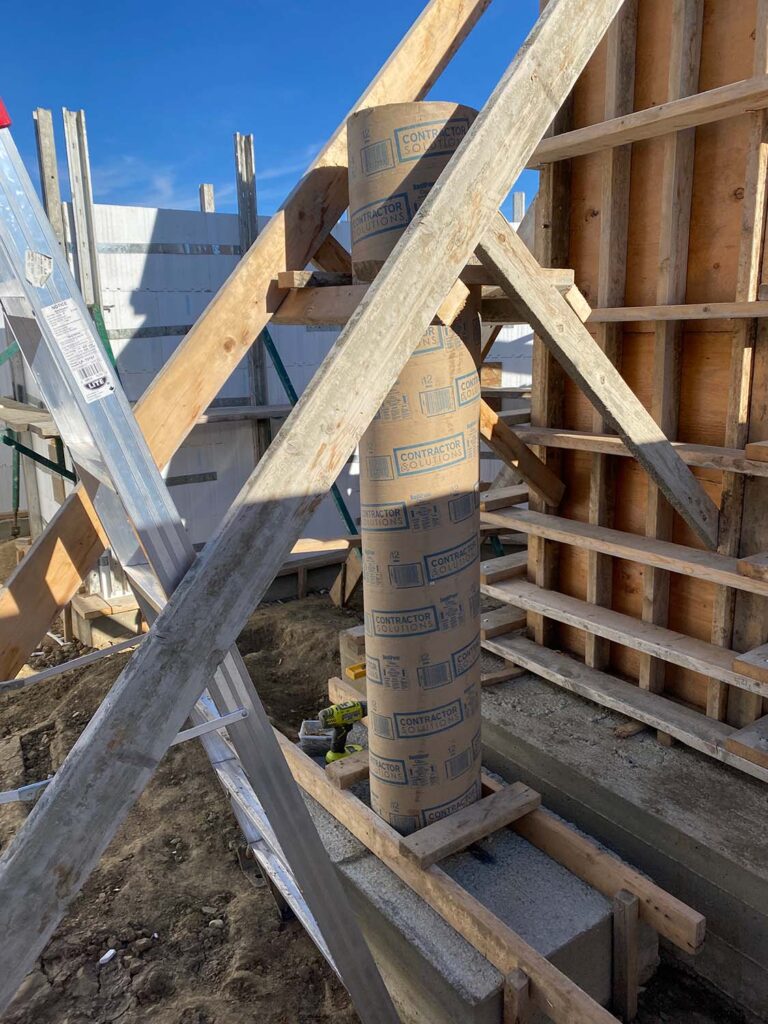
So that they wouldn’t be weakened in the rain, I waited until the day before we scheduled the cement pour to install the 12″ cardboard sonotubes. They will be used to make cement columns transferring the load from teleposts to the floor of the second story to the telepost pads that will be 8 feet below grade. The bracing for the telescope pier was a handy support structure that could also be used to keep the sonotubes plumb.
Finally, here is a shot of everything completed and ready to go to pour cement the next day.